
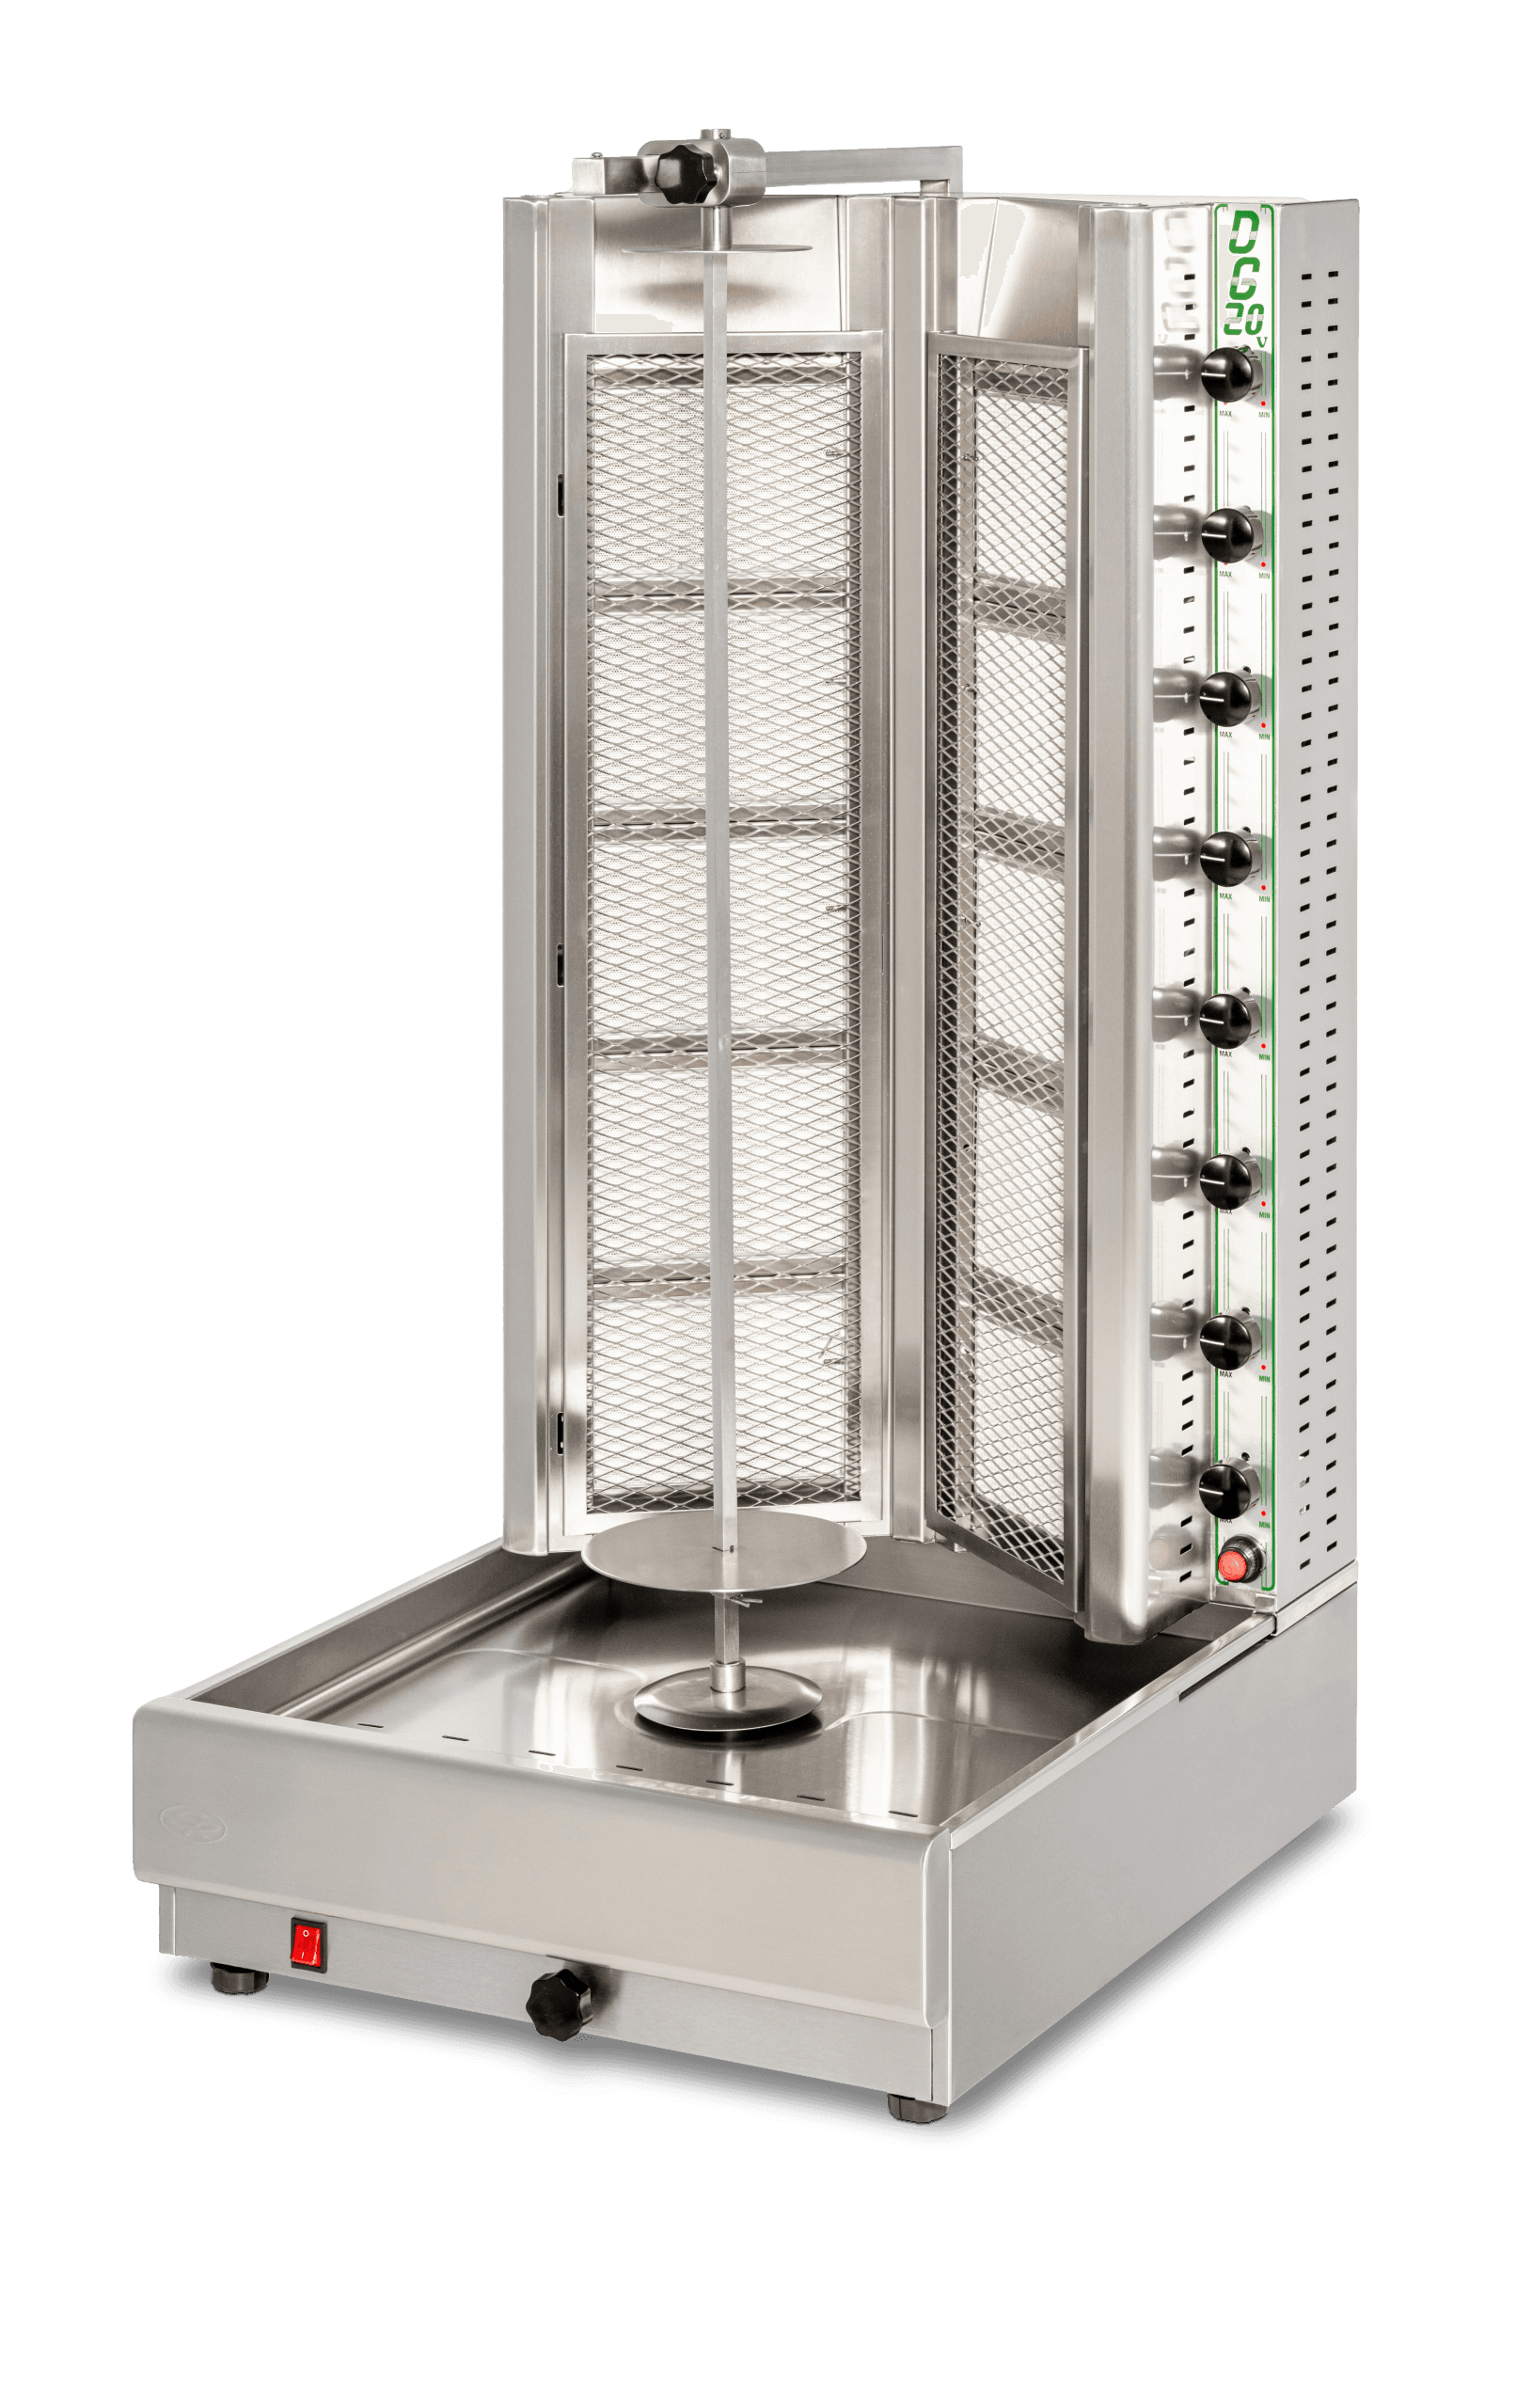
This guide covers proper installation, daily operation, cleaning and routine care for Visvardis gas-powered gyro and shawarma machines, based on the manufacturer's manuals. It also explains when to call a qualified technician for gas connections, conversions and service.
Key takeaways
- Installation and gas connections must be performed by a licensed gas fitter according to local codes.
- Always ignite burners from bottom to top and turn them off from top to bottom.
- Clean the machine after each use, only when cold and with power disconnected, using stainless steel-safe products.
- Never use water jets on the appliance; keep water away from the motor and electrical components.
- For any repairs or gas conversion, contact the manufacturer's authorized service network.
Before you begin: important safety and installation requirements
Visvardis gas gyro and shawarma machines are designed for professional use and must be operated only by experienced, well-trained personnel. The DG-A series (DG4A, DG6A, DG8A, DG10A) and DG-V series (DG12V, DG16V, DG20V) are covered in this guide; the electric DE models are not included. Both the DG20VN installation and operation manual and the DG4A N manual stress that the appliance must be constantly supervised during use.
Installation, connection and calibration must be performed by authorized technicians in accordance with local codes, or, in the absence of local codes, with the National Fuel Gas Code, ANSI Z223.1/NFPA 54, or the Natural Gas and Propane Installation Code, CSA B149.1, as applicable. The DG20VN manual adds that the appliance must be electrically grounded in accordance with local codes or the National Electrical Code, NFPA 70, or the Canadian Electrical Code, CSA C22.2. The machine is equipped with a three-prong grounding plug; do not remove the grounding prong.
Clearances differ between series. The DG20VN manual requires at least 20 inches (51 cm) from combustible materials on the back and both sides, and at least 20 inches from an incombustible wall at the back to allow service access. The DG4A N manual states a minimum of 2 cm from an incombustible wall. The appliance must be located in a very well-ventilated area under an air extractor so that combustion gases are fully absorbed. The DG20VN manual also specifies a minimum ambient temperature of 5°C (41°F) for safe use.
The gas supply connection must use an appropriate metallic tube without junctions or a special flexible metallic tube as per local codes. The DG20VN manual has the appliance and its individual shutoff valve disconnected or isolated from the gas supply during any pressure testing of the supply piping. After all connections are made, check for leaks using only a special spray; never use a flame for this test. The purchaser should post instructions from the local gas supplier on what to do if gas is smelled.
Gas connection, pressure adjustment and conversion
The DG-V series (DG12V, DG16V, DG20V) is factory-set for natural gas at a pressure of 7 i.w.c. (17.4 mbar), as stated in the DG20VN manual. For LP gas, the required pressure is 11 i.w.c. (27.4 mbar). The DG-A series (DG4A, DG6A, DG8A, DG10A) is set for natural gas at 20/25 mbar, and for LPG at 28-30/37 mbar, according to the DG4A N manual. A pressure regulator must be installed to achieve the correct manifold pressure; the DG20VN manual recommends regulators type 96 or 97 with an adjustment range of 2.5 to 12 i.w.c.
To check the pressure, use a manometer with a division of at least 0.1 mbar. Unscrew the insulating bolt from the pressure control point, connect the manometer, verify the pressure matches the required value for the gas type, then remove the manometer and screw the bolt back in. Always check for leaks after this procedure.
Converting the appliance from natural gas to propane or vice versa requires changing the burner injectors (or nozzles) and adjusting the pressure regulator. The DG20VN manual instructs to change the injectors according to the sizes in its Table 1 and to convert the pressure regulator following the steps in its Figure 5. The DG4A N manual similarly directs to change the nozzles using the sizes in its Table 1; the appropriate nozzles are supplied in a socket on the appliance. After changing injectors or nozzles, perform a leak check. Regulation of the small flame is done by turning the knob to the MIN position, pulling off the knob, and adjusting the screw behind the hole with a small screwdriver: turn right to reduce the flame, left to increase it. A final function check should confirm that the flame is widespread, steady and deep blue.
Daily operation: igniting and using the burners
Before first use, clean the machine thoroughly as described in the cleaning section. Open the gas supply. The DG20VN manual and the DG4A N manual both emphasize that burners must be ignited from the bottom to the top and turned off from the top to the bottom. For the DG-V series, the DG20VN manual provides a correlation between knobs, buttons and burners: for example, on the DG20V, knob A controls burners 1 and 2, knob B controls burners 6 and 7, and so on; buttons a and b ignite groups of five burners each. On the DG-A series, each gas valve knob controls one burner.
To ignite a burner on a DG-V model, press the gas valve knob slightly inward and turn it anticlockwise to the MAX position, keep it pressed, and simultaneously press the corresponding lighter button. On DG-A models, the DG4A N manual says to give fire to the burner while holding the knob pressed at MAX. At first start-up, you may need to repeat the procedure to purge air from the burner. Once the burner ignites, keep the knob pressed for 10 seconds to heat the thermocouple so the flame stays on. To reduce the flame intensity, turn the knob to the MIN position.
To turn a burner off, turn the gas valve knob clockwise until the flame stops. Always switch off burners starting from the top and moving downward.
Loading the spit and adjusting distance
The machine must be switched off when placing the spit with meat. Place the loaded spit into the bottom support base, pull up the top round disk, insert the top of the spit, then lower the top disk. Both manuals warn to double-check that the spit is securely in position and that neither the top nor bottom supports move.
The distance between the burners and the meat can be adjusted in two ways. Pull out the body movement mechanism to move the main burner body forward or backward. You can also adjust the top disk by unscrewing the top fixing handle (DG20VN manual) or top regulator (DG4A N manual) and sliding the disk to the desired position. To start the motor, push the motor button to the ON position.
Cleaning and routine care
Clean the appliance only when it is cold and with the power supply disconnected. Never use a flow of water, pressure washer or potent acids, as these can cause rust or damage electrical components. Use a sponge and products specifically made for stainless steel surfaces.
After each operation, remove all movable parts for cleaning. The DG20VN manual lists these steps: remove the spit, remove the doors if present, remove the burners' protection net, remove the spit's support mechanism, and pull out the collector. The DG4A N manual gives a similar sequence: remove the spit, remove the burners' protection net, remove the spit's support mechanism, and pull out the oil collector. Wash and clean these parts, then reassemble them.
Keep water away from underneath the machine where the motor and electrical connections are located. The manuals explicitly warn not to direct jets of water against the appliance to prevent water from entering the components.
Maintenance and service
The manufacturer recommends having the appliance inspected by a qualified technician at least once a year; a service contract is advisable. Keep the thermocouple clean and handle it carefully. Any repairs or maintenance beyond routine cleaning must be performed only by qualified technicians.
The manuals give no fault table, but their lighting steps cover the two common start-up problems: at first start-up the procedure may need repeating to clear the air inside the burner, and a burner that goes out when the knob is released needs the knob held in for the full 10 seconds so the thermocouple heats. For anything else, contact the manufacturer's authorized service network. Do not attempt to service internal components yourself.
Common questions
Can I install the machine myself?
- No. Installation, gas connection and electrical grounding must be done by a licensed gas fitter and qualified electrician in accordance with local codes. The Visvardis manuals explicitly state that installation and calibration must be performed by authorized technicians.
What clearances are required around the machine?
- For DG-V series (DG12V, DG16V, DG20V), the DG20VN manual requires at least 20 inches (51 cm) from combustible materials on the back and sides, and at least 20 inches from an incombustible wall at the back for service access. For DG-A series (DG4A, DG6A, DG8A, DG10A), the DG4A N manual specifies a minimum of 2 cm from an incombustible wall. Always check the manual for your specific model.
How do I convert the machine from natural gas to propane?
- Conversion must be performed by a qualified technician. The process involves changing the burner injectors or nozzles to the sizes listed in the manual's technical data table, and adjusting or converting the pressure regulator. The appropriate injectors or nozzles are supplied with the appliance. After conversion, a leak check and flame adjustment are required.
How often should I clean the machine?
- Clean the machine after each use, once it has cooled down and the power is disconnected. Remove all movable parts, wash them with a sponge and stainless steel-safe cleaner, and reassemble. Never use water jets or acids.
What should I do if I smell gas?
- Follow the instructions from your local gas supplier for a gas smell; the DG20VN manual asks the purchaser to post them in a prominent location. Leaks are checked only with a special leak-detection spray, never with a flame.