
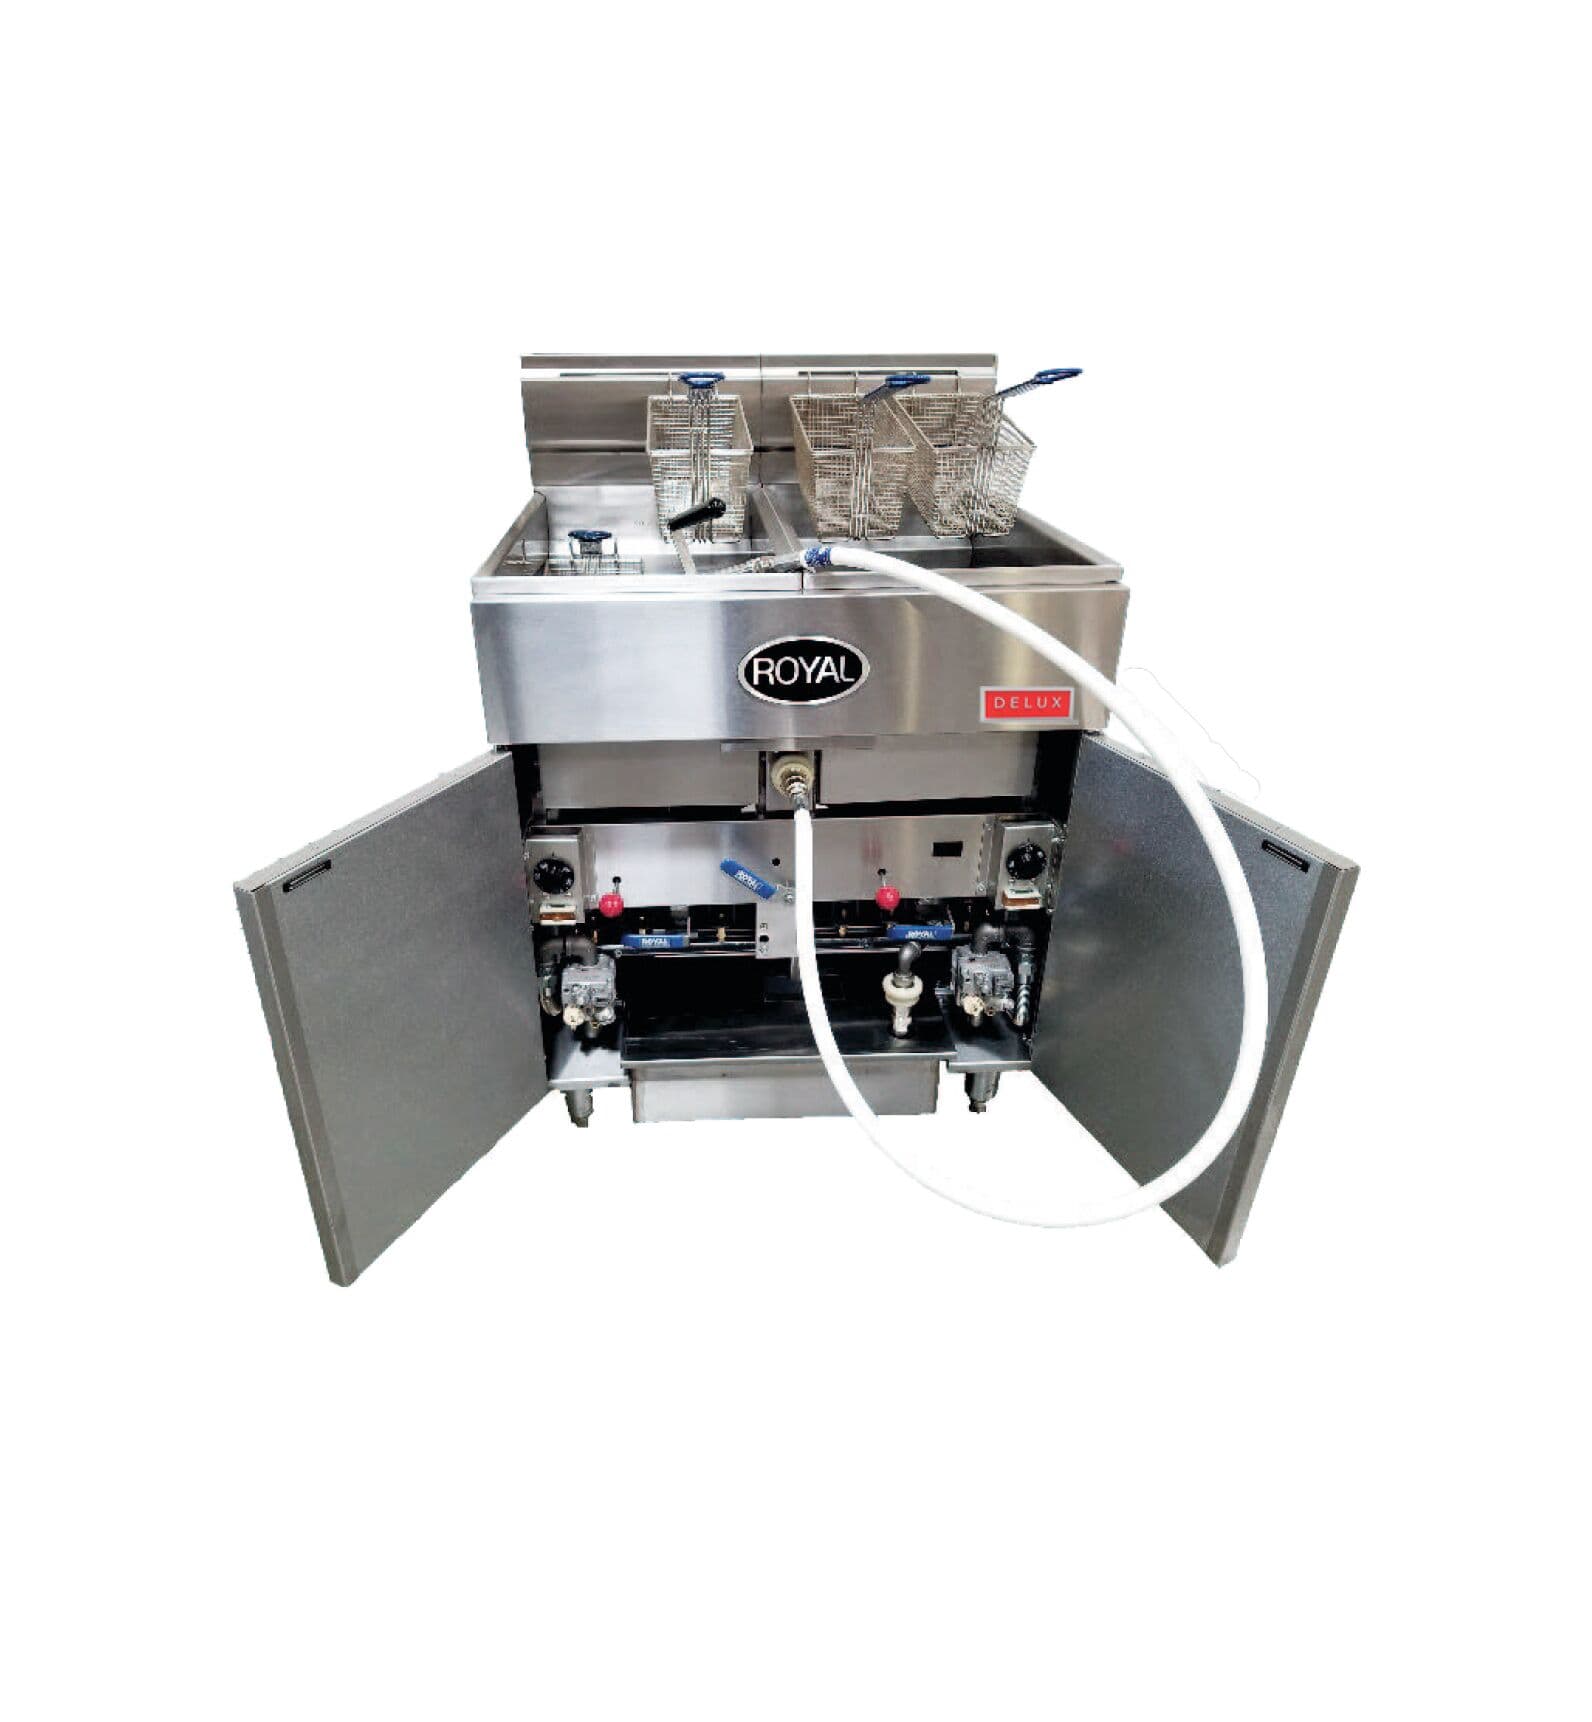
This guide follows Royal's owner's manuals for the RR series ranges and the RFT and REEF fryers: installation clearances, pilot lighting, daily cleaning, weekly boil-outs and built-in oil filtering. All gas and electrical connections must be done by a qualified, licensed installer to local code.
Key takeaways
- Royal's manuals require qualified, licensed installers; gas and electrical work must meet local code.
- RR ranges need 4 inches rear and 15 inches side clearance from combustible walls, none from non-combustible.
- Check gas joints with soapy water, never an open flame, before lighting pilots.
- Boil out RFT and REEF vessels weekly, soaking about one hour.
- Filter the oil daily through the built-in Permafil system; replace oil when necessary.
The RR series and the RFT and REEF fryer families
Royal's RR series gas ranges pair a cooktop with an oven base. The maker's video Royal Range - RR Series Gas Range lists the configurations: open burners, griddles, char-broilers, raised griddle-broilers, hot tops, convection ovens and open storage bases. The owner's manual for the RR and RDR series covers the tops plus both the standard and convection ovens, and the manufacturer's spec sheet for each model gives its width and other dimensions.
Royal's fryer manual covers the RFT, REEF and RCF series. Catalogue models run from the RFT-25 (25 lb oil capacity, 2 burners, 76,000 BTU) through the RFT-50 (50 lb, 3 burners, 114,000 BTU) and RFT-60 (60 lb, 4 burners, 152,000 BTU), plus the REEF-35 (3 burners, 72,000 BTU per tank) and REEF-65 (4 burners, 96,000 BTU, 18 x 18 inch cooking area). Royal's videos also cover the RHEF 45 and 75 fryers.
Multi-tank RFT and REEF units come in 2 to 5 tank layouts, 31 to 97.5 inches wide, with CM product computer controls, DM2 two-channel digital controls or EM electro-mechanical dials. For choosing configurations, see our commercial range buying guide and the natural gas versus propane guide.
Installation: gas, clearances and electrical
Royal's owner's manual requires installation by qualified, certified, licensed personnel, conforming to local codes or, in their absence, the national fuel gas code ANSI Z223.1. The supplied gas pressure regulator must be installed when the appliance is connected to the gas supply, and the supply line must be at least the same size as the inlet; Royal ranges and ovens use a 3/4 inch NPT inlet.
The convection oven needs a 120 volt supply for its ignition system and blower, on a grounded three-prong receptacle; in Canada the wiring must conform to CSA-C22.1. Do not cut or remove the grounding prong, and the oven cannot be operated during a power failure. Both manuals also require the local gas supplier's instructions for a gas odour to be posted in a prominent location.
Fryer installations follow the fryer manual: 6 inches of clearance to combustibles at the sides, rear and floor, and 0 inches to non-combustible surfaces. On a non-combustible floor, the fryer installs on the factory-supplied legs or casters.
- Non-combustible walls: 0 inches at the rear and sides.
- Combustible walls: 4 inches at the rear, 15 inches at the sides.
- Without legs or casters, the unit must extend 2 inches beyond the front edge of a non-combustible curb or platform.
- Broilers are for installation in non-combustible locations only.
Lighting the range and ovens
Before lighting, check every joint in the gas supply line for leaks with a soap and water solution; never use an open flame. Top section burners carry constant-burning pilots, lit manually once the gas is on and the leak check is done, and each pilot adjusts at the brass pilot valve through the valve cover. Hot top and griddle pilots are reached with a long match through the valve cover, or by lifting the plate. The standard oven pilot lights in this sequence:
For the convection oven, set the thermostat and power switch to OFF, wait five minutes, then switch the power ON and set the thermostat. Never run the oven with the motor off; if it will sit unused for more than half an hour, put the switch in the COOL position and open the door, then turn it off at room temperature.
- Turn the oven thermostat off and wait 5 minutes.
- Lift out the lower kick plate to reach the pilot safety valve and igniter button.
- Check near the floor for the odour of propane, which is heavier than air.
- Depress the red safety valve button and hold it; press the red igniter button until you hear a snap and see a spark, or apply a lit match.
- Keep holding until the pilot stays lit, then set the thermostat and confirm the burner lights with no yellow flames.
- Replace the kick plate.
Cleaning the range
Daily care, per the manual: clean the top grates with warm water, mild cleaner and a wire brush; brush debris from the burner area; and empty and clean the grease pan. Griddle plates are washed with warm water and a fine-grit griddle brick, and can be brightened with vinegar, pickle juice or club soda while warm.
For the oven, remove the racks and wash them in hot soapy water, then lift the oven bottom out from the front and slide it forward. Scrape food with a nylon griddle scraper, careful not to scratch the porcelain liner panels. Ammonia is allowed only in a cold oven with direct ventilation, spray oven cleaners must not touch the temperature probe, and after cleaning you rinse with 1/4 cup of vinegar to one quart of clear water and wipe dry.
Periodically, remove the open burners and clean them with warm water and a wire brush, keeping the ports clear; the manual says valves should be checked and lubricated by your service agency or the local gas company. On stainless surfaces, skip steel wool and abrasives: hot soapy water during the day, a stainless liquid cleaner at day's end, and a wood or nylon scraper for encrusted material.
Fryer setup and first use
New Royal fryers ship with a coating of oil inside the vessel. The fryer manual says to remove it with hot soapy water, washing soda or another grease-dissolving liquid, then rinse thoroughly, drain, wipe dry, and clean the baskets and crumb screen before first use.
To light the fryer, set the thermostat and the gas cock dial on the combination gas valve to OFF, wait five minutes, turn the gas cock to PILOT, depress it and apply a match, holding about 30 seconds until the pilot stays lit. With the gas cock ON, the burners should ignite within four seconds of a thermostat setting. Main burners must never be ON when the vessel is empty.
With solid shortening, fill to the oil level marking, cut it into small pieces and pack tightly, then cycle the burner 10 seconds ON and about a minute OFF until melted, shortening the ON time if scorching occurs. Do not overfill. At day's end, turn the gas cock dial and thermostat to OFF, the power OFF where applicable, and filter the oil in all fryers.
Boiling out a Royal fryer
Royal's video How to Boil Out a Royal RFT or a REEF Royal Fryer demonstrates the boil-out procedure for both series. The fryer manual schedules a full boil-out weekly, in this sequence:
The manual and the maker's videos add two warnings: remove all water before adding oil or shortening, or hot oil will splatter, and wear proper protective gear when boiling out or filtering because hot liquid can cause serious injuries. Drain hot oil into metal containers only, never plastic buckets or glass.
- Shut the fryer down: gas cock dial and power off.
- Drain into the filter pan or a steel container, flushing sediment from the bottom with liquid oil.
- Close the drain valve and fill the vessel with a boil-out solution mixed with water.
- Relight the pilot and turn the burner on; when the solution boils, turn the thermostat off and soak about 1 hour.
- Drain, scrub with a brush, rinse thoroughly, repeat if necessary.
- Wipe dry with soft towels and refill with clean oil or shortening.
Filtering with the built-in system, and service
Royal's video How to filter a Royal fryer with Ultra Plus filtration covers the built-in filter system, which the maker says suits fryers from 35 lb to 75 lb and up to five fryers in one system. The fryer manual's daily list: wash the loose parts (basket hangers, baskets, crumb screen), wipe all accessible surfaces, and filter the oil at the end of the day, replacing it if necessary and filtering more often under heavy use. For the broader routine, see our fryer oil filtering and changing guide.
The RFT and REEF filter parts list names the consumables: Permafil flat paper 15 x 15 inches for pans built before November 2023, a Permafil paper envelope 15 x 23 inches, fine-mesh screens, 80 lb and 100 lb filter pans, the pump and motor assembly, and a 60 inch hose wand with quick-disconnect couplings. The list also separates natural and LP pilot assemblies and gas valves, so have your gas type ready when ordering.
For repairs, Royal's manuals direct maintenance and service to qualified personnel knowledgeable with Royal equipment, through the manufacturer's authorized service network. Ask Norpex about a specific model or its filter parts.
Videos from the maker
Common questions
What clearances do Royal fryers need?
- The fryer manual lists 6 inches to combustibles at the sides, rear and floor, and 0 inches to non-combustibles. On a non-combustible floor, install on the factory-supplied legs or casters.
How often should I boil out my Royal fryer?
- Royal's manual sets the boil-out as a weekly task, and a new vessel needs a wash-out before first use. Let the solution soak about one hour before scrubbing and rinsing.
Does the RR convection oven need electricity?
- Yes. The manual says it needs a 120 volt supply for the ignition system and blower, on a grounded three-prong receptacle, and it cannot be operated during a power failure.
Who should service my Royal range or fryer?
- Royal's manuals direct maintenance and repairs to qualified personnel knowledgeable with Royal equipment, through the manufacturer's authorized service network. Ask Norpex about model or parts questions.